When we moved to Fanling in 2008, we used to cycle south to visit our friend Tom in Sham Chung every Saturday morning. Between Fanling and Taipo, this entailed following a narrow path along the east side of the main railway line, starting at the first of six footbridges that crossed the line. There was a road between the third and fifth footbridges, and we would cross the line via the sixth bridge. There is only a narrow gap between the mountains east and west of the line where it leaves Fanling, but between the third and sixth footbridges, the mountains fall back to reveal an extensive area of flat land on both sides of the railway that is obvious to train passengers, if they’re paying attention.
At the bottom of what is the first footbridge when coming north, I’d often noticed a path that meandered off to the east in addition to the continuation path we followed north from this point. The only problem in those early days was that the ride to Sham Chung was a 72km round trip, and I never felt like exploring at this point on the way back (and exploring on the outward journey wasn’t an option if we wanted to avoid the crowds on the main cycle tracks after about 12.30).
Then, following a bike accident in 2011, we didn’t come this way again until 2015, when Paula started working at the Chinese University of Hong Kong and could cycle to work occasionally. By this time, the government had completed the construction of a cycle track between Taipo and Fanling, most of which lies west of the railway. However, the section between the first and fourth footbridges is on the east, and I began to wonder whether I could find a route between these footbridges that didn’t involve following the cycle track. I almost succeeded a few weeks ago, ending up back on the road 200 metres or so short of the fourth footbridge, although I told Paula that I doubted whether I could remember the route I’d followed. It was that complex!
Anyway, I was back three days ago for another attempt, and this time I did get it right. I even did the route twice to try to fix it in my memory. And I did it again twice yesterday to take a few more photos. It would probably take a hundred photos to illustrate all the twists and turns, but I hope the following collection conveys something of the fun, and fun is what this is all about.
* * *
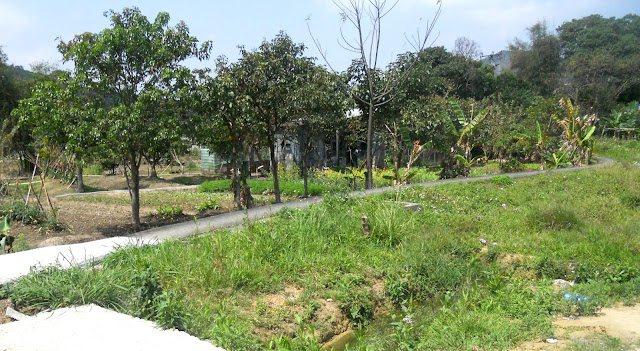
We begin with a view from the first footbridge, which clearly shows the start of the path:
The next two photos were taken from positions a short distance beyond where the path disappears in the first photo. Note the very narrow path turning off the main path in the second photo and running in front of the plastic ‘greenhouses’. That is the way to go:
The previous narrow path leads to an area of rough tracks, muddy in wet weather, that is likely to change in the future as it is developed, but look out for this path, which leads up and right towards the first village houses encountered on the route:
At the end of this path, my aim was to keep as high as possible when choosing between possible continuation paths, and if you’re trying to follow the route, I’ve included the next photo because it is sufficiently unusual that you will be reassured immediately that you’re on the right track. Well, an abnormally tall and slender palm growing up through a flame tree is a bit odd, I think you’ll agree:
The path in the previous photo quickly becomes rather overgrown:
The house on the left in the previous photo is in a style that was common in the middle decades of the last century. It was common practice to include the date of construction, and the earliest date I’ve seen on such a house is ‘1936’ (our friend Tom’s house in Sham Chung).
However, the route now climbs to the right of the right-hand house seen in the previous photo:
I know that on my first exploration, I continued straight ahead from the top of the hill, but on my first subsequent foray, I noticed a road with a speed bump on the right. I had better check it out, I thought:
It turned out to be a dead end, leading only to what would once have been the village school (I can’t imagine that it’s still in use). However, from the top of the hill, I could see what looked like an alternative exit from the car park just below the top:
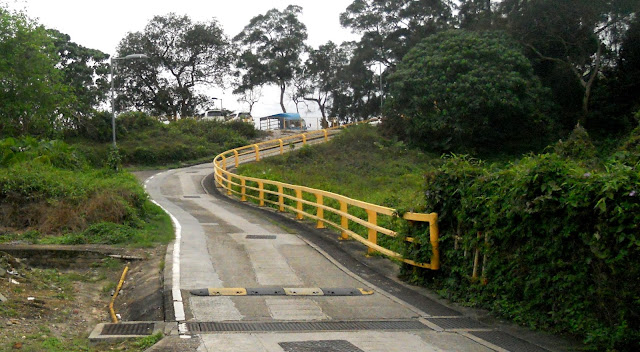
Mind you, this ‘alternative exit’ is not for the faint-hearted. The next photo was taken looking back up the path, the gradient of which is probably around 40 percent:
I did think that I would have to ride back up this path, or attempt to, but to my surprise, the path at the bottom seemed to be leading somewhere:
There’s a T-junction ahead:
…and the natural choice is to turn right, away from the cycle track:
This leads to quite a good road, although you aren’t likely to encounter much traffic:
It is some distance before there is a viable right turn off this road, but here it is:
The next part of the route involves a series of paths and narrow alleyways, and because the photos were taken on different days, I’m not sure if the sequence is correct, but this is the kind of territory you will have to negotiate here:
Emerging from one alleyway, you spot a possible continuation on the other side of the road:
This one really is a tight fit if, like me, you ride a bike with an usually wide handlebar.
I rode past the archway in the next photo before thinking that it would make a good clue that you were still on the right track, which is why my bike is in the shot:
The archway is the entrance to some traditional village houses, and the next alleyway also has old on the right, modern on the left (turn left at the end of the alley; straight on is a dead end):
I took the next two photos not to illustrate the route but to show how ridiculous some of the walls are that I come across around these parts. I hadn’t originally planned to follow the path that runs past them. First, there is a single-thickness brick wall; then there is a wall of roughly hewn granite blocks stuck together with a bit of cement. I wouldn’t want to stake my life on their structural integrity!
The next photo is not part of the route. It is a T-junction to the left, but you should ignore the blandishments of what is the easy option and continue straight on:
No! This hill is not the hard option, although you will probably need bottom gear:
After a steep descent, you will find yourself at the start of another narrow path. The beginning of the concrete wall in the second photograph can be seen behind the central palm in the first:
Look closely at the previous photo and you will see another path doubling back to the right. This is the real hard option:
This is one of the tightest U-turns you will ever have to negotiate, and there are awkward factors that aren’t obvious from the photo, like the 30cm drop if you decide to attempt the short way around the bend, or the downslope out to the left (right on the photo) if you opt to swing wide, which will cause you to accelerate just when that’s the last thing you would want to do. There is also a rounded little drop on the left of the path that forces you to make a tighter turn than you expected. I failed on my first attempt, but now that I know what’s required, I’ve succeeded on my last three attempts. In case you hadn’t guessed, the easy option approaches this junction from the direction of the camera.
Finally, here are two photos from the latter part of the route. Nothing difficult, just an attempt to show more of the atmosphere of this interesting detour.
A couple of statistics: the section of cycle track that this detour avoids is 1.4km long (and not remotely interesting). The detour is 4.1km, almost three times as long, but it’s a lot more fun. Which one would you choose?


You will surely know why it is boring to ride on regular bike route...
ReplyDeleteI do indeed! And you run the risk of being arrested if you don’t get off and push your bike where the cycle track crosses the road, which I refuse to do!
DeleteNice photos Dennis! I've noticed that there are very few (if any) people in your photos. Is that by chance, or do you try to avoid taking their photos? That brick wall is scary!
ReplyDeleteYou’d be surprised how few people I encounter on rides like this Pat, and I didn’t have to wait for anyone to get out of the way before taking any of these photos, although for this type of photo I do prefer that there isn't anyone in shot.
DeleteThe brick wall is probably the most extreme I’ve seen, but the construction method is surprisingly common.